Learn How to Draw a Flower with an Easy Tutorial
Kids love to draw and learning how to draw a flower is one of their favorite things. My students are always asking me to draw different elements for them. They also love using step-by-step tutorials to learn how to draw on their own.
Drawing can be a great part of a STEM program and help your child or student add in an artistic component. Using a step-by-step drawing guide is also a great way for children to learn how to break objects apart into basic shapes like circles, ovals, squares, and lines. It also helps them to start to understand measurements and how objects take up space.
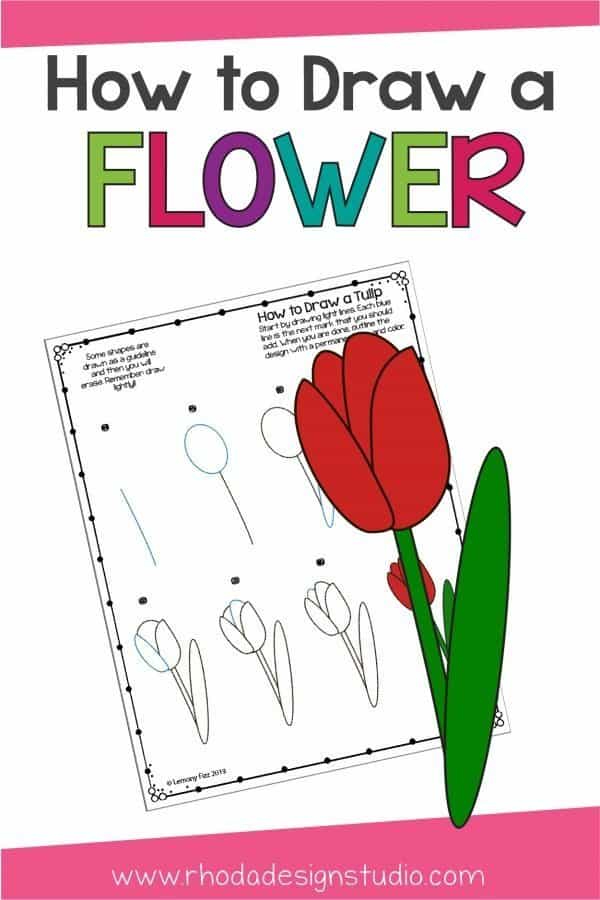
The following tutorial can be used to learn how to draw a flower. You can follow it step-by-step here on the blog post or you download the free tutorial to add to your student’s drawing center or folder. They will love learning to draw this flower and you can check out other how to draw flower tutorials to add to the collection.
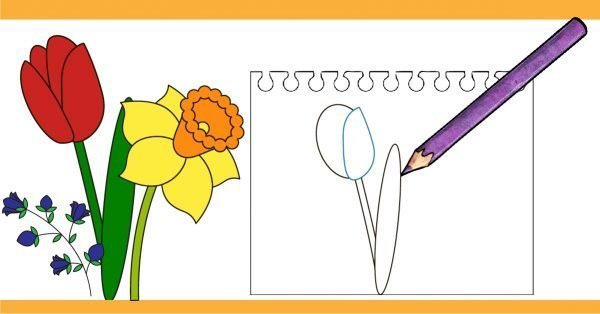
Learn How to Draw a Flower
Ready to draw a tulip? This is one of my favorite spring flowers. I finally remembered to put some bulbs in during the fall. I am so ready to see what grows this spring. After the snow leaves!!
Follow the step-by-step directions below completing each numbered card. Draw the blue line or lines as the next step. Remember to draw lightly. Some steps might have you draw a shape as a guide and then erase parts of it later.
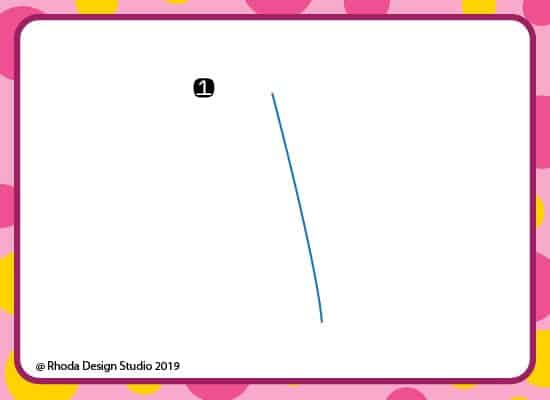
- Draw a line for your stem. Make it as long as you will want your flower to be minus the blossom. Remember, we still need to add the blossom to it, so save room for that.
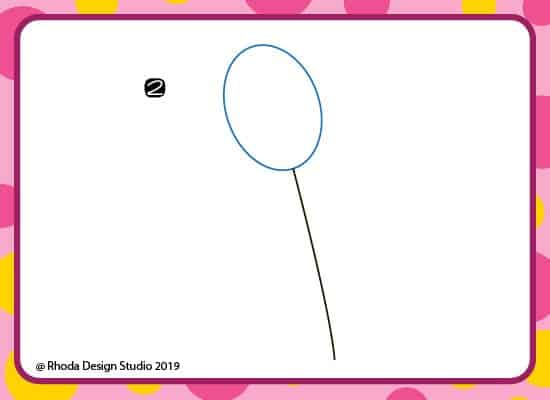
- Draw an oval to help show you the shape of the tulip blossom. We are drawing an oval as a guide to show how big our blossom will be and so we know where to add other design elements to the flower.
- Add one of your leaves. Tulip leaves are long. When you are drawing this flower you are going to make long thin leaves. They are a little taller than your stem.
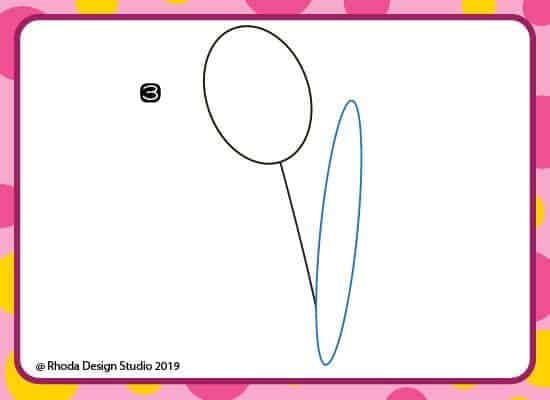
- Now we are adding in some of the tulip petals. Draw an overlapping shape on your oval. Hopefully, you remembered to draw lightly when you drew the oval and now you can erase parts of it out of the newest shape. This gives the illusion that one shape is overlapping another while you draw the flower.
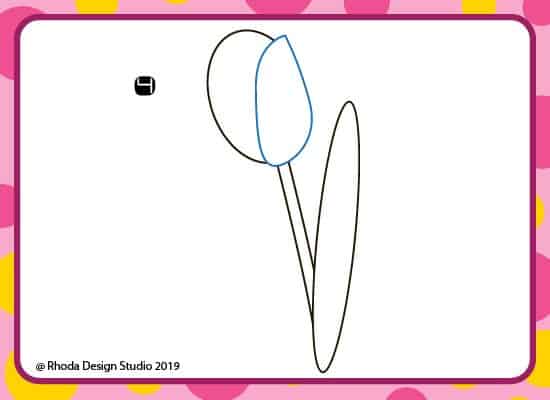
- Add in the second overlapping petal on the flower. It overlaps your back shape (the oval) and it also overlaps the first petal that you drew. Just a little. Erase out any of the guidelines.
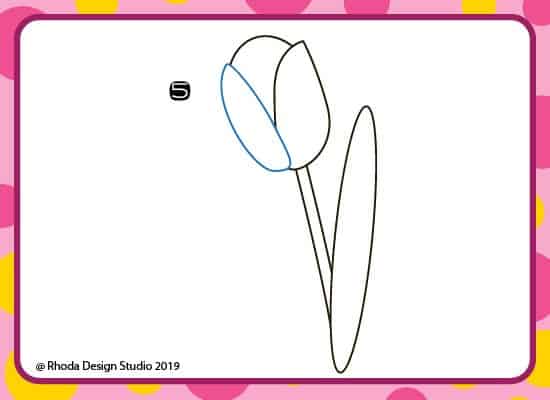
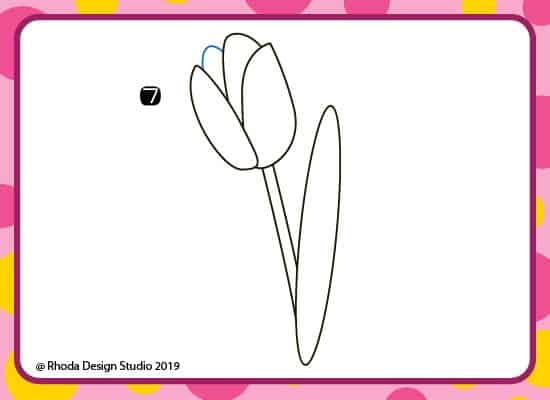
- Add in another petal. You are almost finished drawing this flower. You have a few more petals to add in and then you will get to color it!
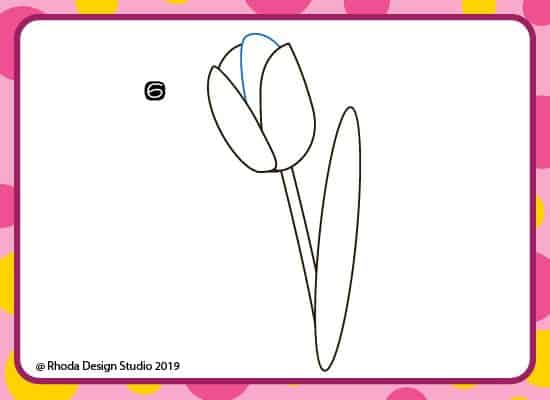
- Add in the last petal. Now you have 4 overlapping petals that show the blossom of your tulip. You officially know how to draw a flower! Congratulations 🙂
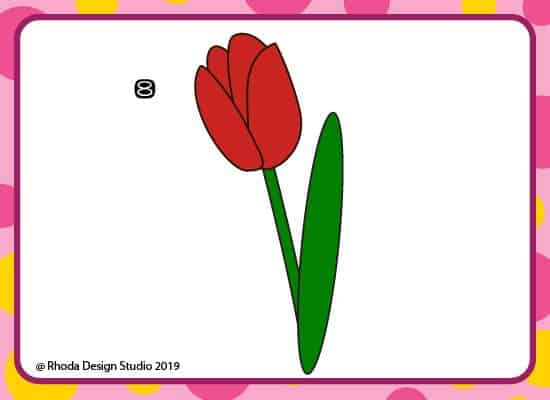
- Use markers, colored pencils, or crayons and color your drawing. Once you have drawn one flower, you will be even better at drawing others. Keep practicing by drawing a whole row of flowers. Color them different spring colors to show a whole rainbow of flowers. Group them together to make a bouquet.
Learning how to draw a flower doesn’t have to be hard or overwhelming. Breaking a design or object down into basic shapes makes it easier to draw. What other types of flowers can you break down into shapes and draw?
How to Draw More Flowers
Maybe you would like to draw a rose or other spring flowers. Maybe you want to draw a whole bouquet of beautiful flowers and give them to your mom or grandma or teacher to hang on the fridge or display board.
There are so many types of flowers, colors that you can use, and ways that you can blend them together. It’s also fun to make flowers that aren’t “real” looking but that are still beautiful designs and colors. Think about patterns, shapes, and geometric designs when you are drawing.
If you liked this drawing tutorial, let me know. I would love to share your drawings on my Instagram. Send me an email or leave a comment below with a link to a photo of your flower drawing.
